About Me

My photo
I live in the beautiful city of Portland, Oregon. I am a work at home mom and meeting planner, who loves what I do in every way. I think I get the best of both worlds; a little travel and some home time with my little chicklets. In my spare time I enjoy hosting parties, art, cooking, crafting, re-doing furniture, wogging, tennis and shopping. I am going through a journey that I wanted to share. I hope in some small way it helps you.

Sunday, January 29, 2012

Yummiest Mac and Cheese ever!

It's winter here in Portland, we even had some snow last week.  It makes me want to curl up, with a warm blanket and a big bowl of comfort food.  In my opinion Macaroni and cheese is the ultimate comfort food.I get asked for this recipe more than any other.  And I just cannot take the credit any longer!  I must share the wealth of this most delicious recipe.

Look at that yummy cheesy goodness...It tastes as good as it looks!

Warning!  This is not a low fat recipe. Yum!

Macaroni and Cheese
20 Servings (That's if they just have one!)

For topping
1/2 stick unsalted butter
2 cups panko, bread crumbs or saltines
1/4 pound coarsely grated extra sharp cheddar (1 1/2 cups)
1/2 cup grated Parmigiano-Reggiano

For macaroni and sauce
1 stick unsalted butter
6 Tbls all purpose flour
5 cups whole milk
1 pound coarsely grated sharp cheddar (6 cups)
1/2 cup grated Parmigiano-Reggiano
1 pound Rigatoni (penne or elbow macaroni would work too)

Make topping:
Preheat oven to 400 degrees with rack in middle
Melt butter, then stir together with panko and topping cheeses in a bowl until combined well.

Make sauce:
Melt butter in a heavy medium saucepan over medium-low heat and stir in flour.  Cook roux, stirring 3 minutes, then whisk in milk.  Bring sauce to a boil, whisking constantly, then simmer, whisking occasionally, 3 minutes.  Stir in cheeses, 2 tablespoons salt, and 1/2 teaspoon pepper until smooth.  Remove from heat and cover surface of sauce with wax paper.

Make macaroni:
Cook pasta in a pot of boiling salted water until al dente.  Reserve 1 cup cooking water and drain macaroni in a colander.  Stir together macaroni, reserved cooking water and sauce in large bowl.  Transfer to a 10x13 casserole dish.

Sprinkle topping evenly over macaroni and bake until golden and bubbling, 20 to 25 minutes.

Enjoy!

Thursday, January 26, 2012

Valentines Day Cupcakes

Aren't those just the cutest cupcakes you have ever seen?!  I think so, but I got to eat them so that make them that much cuter.  I saw a version of this cupcake on Pinterest and HAD to make them.  And therefore, I just must share them with you!


This is the good part revealed...half cake, half brownie equals all delicious with some frosting on top!

It just gets better and better, right!  If only the next picture was of you eating it...
Cherry Chocolate Brownie Cupcakes
Serves 24...ish
This recipe was adapted from this one and I think it would be fabulous as is, especially with PB frosting!
Ingredients
1 (19.5 ounce) package brownie mix
2 eggs
1/2 cup canola oil
1/4 cup water
1 (18.25 ounce) package cherry chip or strawberry cake mix
2 tablespoons canola oil
1 1/3 cups water
3 egg whites

Directions

  1. Preheat an oven to 350 degrees F (175 degrees C). Line 48 muffin cups with paper liners.
  2. Whisk together the brownie mix, 2 eggs, 1/2 cup canola oil, and 1/4 cup water in a bowl. Stir just until fully incorporated, about 50 strokes; set aside.
  3. Mix the cake mix, 2 tablespoons canola oil, 1 1/3 cup water, and 3 egg whites in a large bowl with an electric mixer on low speed until combined. Mix on medium speed for 2 minutes.
  4. Spoon the brownie batter into prepared muffin cups, filling each cup 1/3 full (maybe a little less) . Spoon the cake batter over the brownie batter, until muffin cups are each 2/3 full.
  5. Bake in the preheated oven until golden and the tops spring back when lightly pressed, about 20 to 25 minutes.               

Now I am kind of a frosting snob.  Some would say I like the wrong type of frosting.  I like the super sweet yummy kind of frosting that well I don't know how to describe.  Except I could eat it alone..and then be sick.  But I would it is that good to me.  At first I made a fancy smancy Tom Douglas (famous chef from Seattle) white chocolate buttercream frosting.  It took me forever and I hated it, so I went with my good old stand by frosting that I learned about in my Wilton cake class.  I personally love this frosting.  But I think frosting is a very personal choice.  So please feel free to make your own favorite frosting for this cupcake.

Wilton Buttercream Frosting

Ingredients:
1 cup solid vegetable shortening
1 tsp. vanilla extract (make sure you use clear if you want white frosting)
1/2 tsp almond extract
1/2 tsp butter extract
7-8 teaspoons milk or water
1 lb. confectioners' sugar
1 tablespoon Meringue Powder (Micheal's has this)
pinch of salt (optional)

Directions:
In case of egg allergies, meringue powder may be eliminated.
Cream shortening, flavoring and water. Add dry ingredients and mix on medium speed until all ingredients have been thoroughly mixed together. Blend an additional minute or so, until creamy

Tuesday, January 24, 2012

A little "Love" for my wall!

Guess what?  I made the easiest, cutest and cheapest craft ever that I would like to share with all of you!

I have a Christmas banner I like to hang in my very small entryway and this year when I took it down I felt a huge void.  I was thinking... that space needs a banner year round, I neeeeeed to make one for the next holiday.  One of my favorite holidays is up next, Valentines Day.  It was not my favorite holiday when I was single.  And hearts have always been hit or miss for me.  But I just LOVE this banner!

Super easy!  Just find a heart shape you like and make a pattern.  I just drew a heart I liked and then cut it in half.  It was easier for me to fold the felt in half, put the pattern on top and cut it out.  I used three different colors of felt; red, dark pink and dark red.  I cutout 19 hearts total.  I grabbed some ribbon from my garage (I think it cost a dollar at Micheal's) and hot glued on the hearts to the ribbon.  And Wha-la! 

See!  So Cute!  The subway art is compliments of The Girl Creative, click here to download for free!

Sunday, January 22, 2012

Craft Day-January

Every month or so around here (in Portland), we have a craft day or night!  The ladies LOVE craft day!  Some of them crafters, most of them are not.  Which is why craft day is such a treat.  I try to make it as easy as possible by making craft kits ready to go.  All supplies are included and the craft is meant to be finished in the few hours allotted.  No projects are left unfinished!
This month was hosted by a good friend of mine.  It was so nice to just go to her house and all I had to worry about was the crafts...which for this month were some of my favorite!  It's that lovey dovey time of year, so we just had to make some Valentines Day crafts.  And there was glitter involved, what is better than glitter!!! 

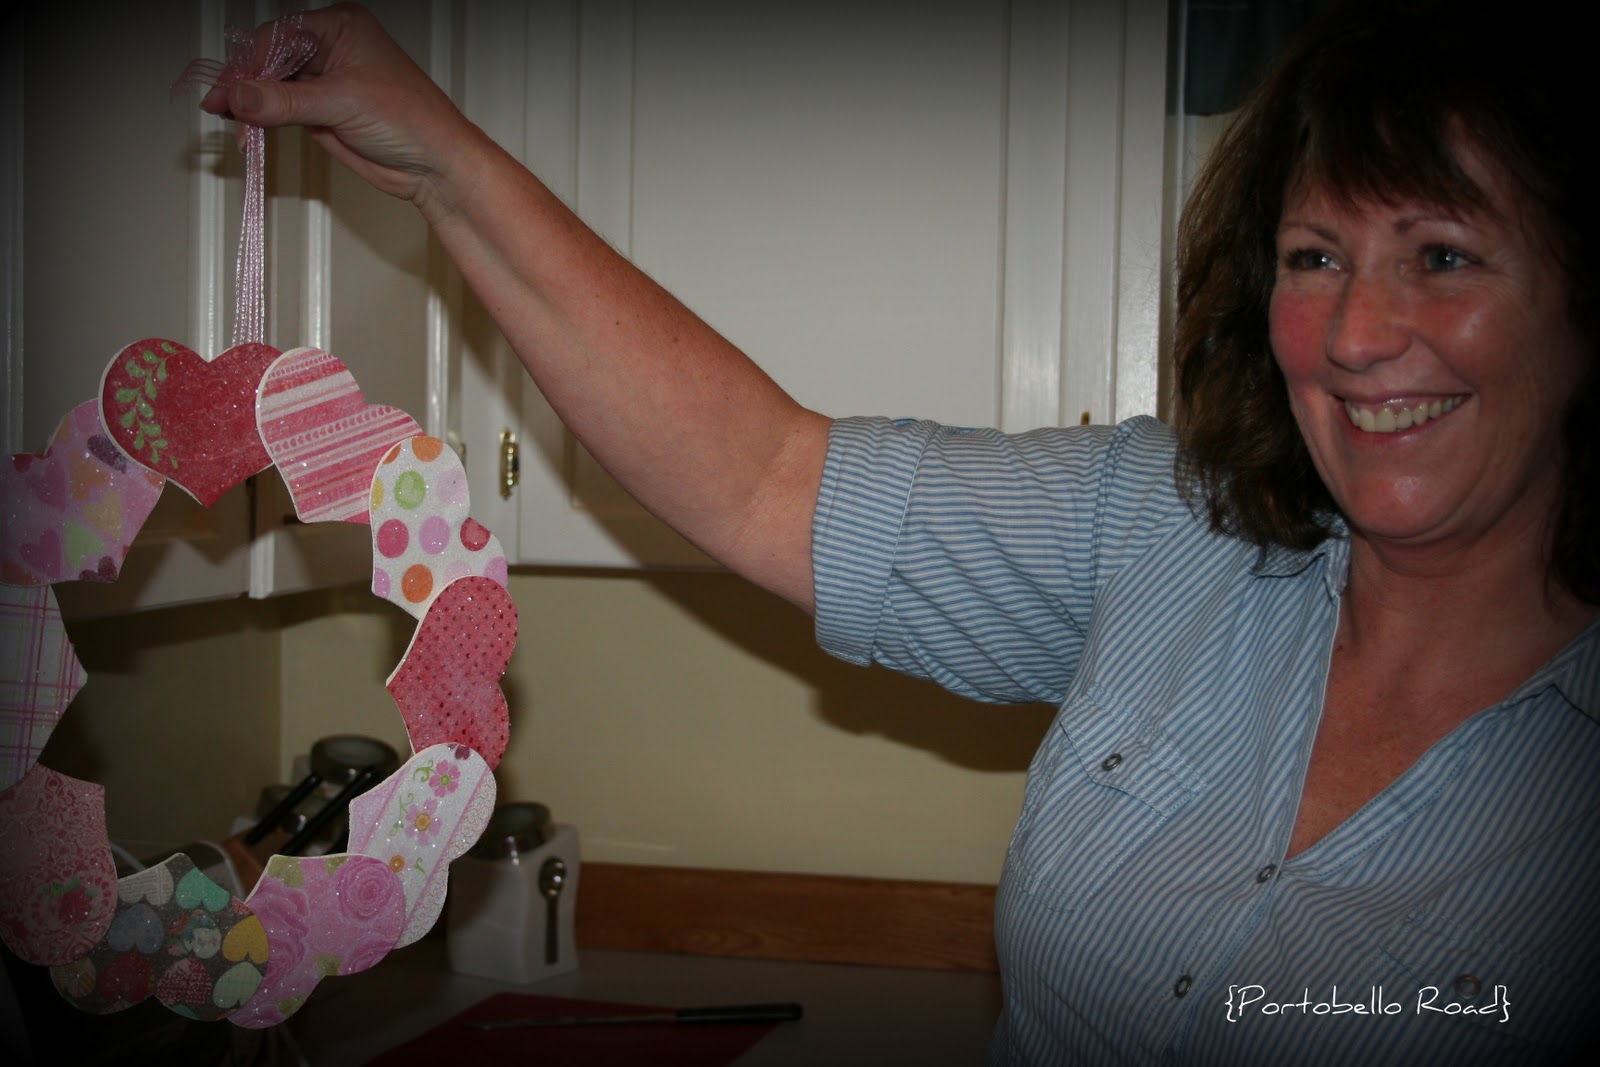
Here is our version of a glitter heart Valentines Day wreath...

First you get these lovely little hearts and paint the sides if you want.  I left mine undone, but here are some that were painted.
Then the fun part, you pick your scrapbook paper!  Trace your hearts on the paper, and cut the paper hearts out.  Mod Podge the paper onto the wood heart.  Then paint some regular craft glue onto the paper.  Immediately sprinkle iridescent glitter onto the heart.  When dry, tap the heart to release any loose glitter.  We then sealed it with Glitter Blast.  This stuff is for real, it's awesome.  I don't know how but it makes that glitter stay no matter what!

Then you get these fabulous MDF wreaths (we used 12").  First make a loop, bow optional with your ribbon.  Hot glue to the wreath to hold it in place and then hot glue the hearts to it.
Aren't they cute and doesn't she look so happy!!  Yay for craft day!

Saturday, January 21, 2012

Small Office-Big Decor

My husband Ben recently got a new job!  He works downtown and they gave him his own office.  It needed a little pick-me up in a bad way.  And it was pretty much a blank slate, which makes me happy!


So off I went to Home Decor, Marshalls and Craigslist.  I love a good reason to shop!  Here are the after pics...


He needed some better lights in a huge way.  Every knows those translucent lights can suck the life out of you.  The picture on the back wall is actually from Ikea, awesome deal.  He evaluates commercial buildings so the NYC sky scape works well for him.  The art on the rights is something I put together from some old fence wood.  I put three together and painted a flag on the wood.  I got the wood on craigslist.  You could actually paint anything you want on the wood. 


I just love the old wood, isn't it yummy!


Wednesday, January 11, 2012

CeCe's Corner... Valentines Kit

Hi Friends!  Are we feeling lovey yet?  V-day is approaching soon and those decorations can start loving up your home.  I wanted to share a special post by my good friend Claudia over at CeeCee's Corner.  I think these craft kits are absolutely adorable!  Enjoy!

Merry Valentine's Day
I just love the sound of that, don't you? Although it's probably a silly thing to say, and will never catch on, I don't care! I'll say it anyways. Life has been hectic. I haven't done anything special or gone on any amazing vacations... I stayed in lovely Oregon for the holidays, but I was able to have my whole family come up here and spend time with me. They live out of state and were here for a very short 3 days, but I loved every minute of it. I have three younger brothers who are kind of crazy, and they invited a couple of their friends to join us for Christmas, so we had a full house. We ate, played basketball, played games, joked and laughed, and ate some more. It was heaven.

  Getting back into a routine after the holidays is difficult. So, for the past couple of weeks, I have just been plain lazy. I haven't had much motivation to do anything other than bum around with my kids. My oldest goes to preschool on Tuesdays and Thursdays for a couple of hours, but other than that, we have no where to be. At times, it drives me crazy because I am not used to being at home for so long. The past 5 years, I have had a husband in school and I was in school part time. Between the two of us going to school, my husband had two part-time jobs, I had a part-time job, and we would shuffle our kids around to grandparents. Now, my husband goes to work, I stay home, and life is a lot more calm.
     Since life has slowed down a bit, I have been directing my thoughts towards Valentine's Day. To kick things off, I made a lovely little Valentine's decoration to brighten my entertainment center.


It's a simple decoration and didn't take much time for me to make, maybe an hour or so... but I love it. And since I love it so much, I have decided to put together a craft kit for it. It's the perfect craft for everyone. I simply modge podged some pearly white cardstock onto some cardboard, made several red felt rosettes using the tutorial I found 
here, arranged them in a heart shape, and hot glued them onto the cardstock. I placed it inside an 8x10 frame (I took out the glass portion) and a heart was born. :)

Now, if you order 1 kit, it'll be $10 + $2s&h, but if you order 2 kits it'll be $12.50 (not per kit... that's the price for both kits combined!) plus the $2s&h, and if you order 3 kits, it'll be $15.00 for all 3 (plus the $2 s&h). These would be awesome to order if you wanted to have a girls night without breaking the bank.  If you want to order 4 or more, please email me at ceeceescorner@gmail.com for pricing options.
 You can all do this on your own, but if you don't have felt sitting at home, or don't want to cut out19 squares, then you must simply order one of these kits! Or, if you like the craft but don't want to make it, you can purchase it in my Etsy shop here. If you are looking for another fun craft kit, you can purchase the Magnetic Recipe Boardhere (also perfect for a girls night!).
     I am in the Merry Valentine's Day spirit, so please stay tuned for more Valentine's Day ideas! xoxoxo


Pricing
Felt Rosette Color


Sunday, December 25, 2011

January Craft Night...at Sarah's

Happy Holidays everyone!  Soon the lights will come down and the presents put away and our lives may get a little less hectic.  My good friend Sarah will be hosting our monthly craft night at her house in forest grove.  The date is January 21st, time tbd. 

Here are the fun crafts we will be doing...

Glitter Heart Wreath...$18.00
(Includes: Wood hearts, wreath form, ribbon, scrapbook paper, glitter and all supplies)


Holiday Blocks-Sweethearts or Lucky...$15.00 (From How Does She)
(Includes: Sanded blocks, Scrapbook paper, ribbon, clips, vinyl, paint)


Please send me (christielblake@gmail.com) or Sarah (sarah.c.taillon@gmail.com) your order before Tuesday, January 10th.

Happy Crafting,
Christie