About Me

My photo
I live in the beautiful city of Portland, Oregon. I am a work at home mom and meeting planner, who loves what I do in every way. I think I get the best of both worlds; a little travel and some home time with my little chicklets. In my spare time I enjoy hosting parties, art, cooking, crafting, re-doing furniture, wogging, tennis and shopping. I am going through a journey that I wanted to share. I hope in some small way it helps you.

Wednesday, October 26, 2011

Recipe Board Craft Kit!

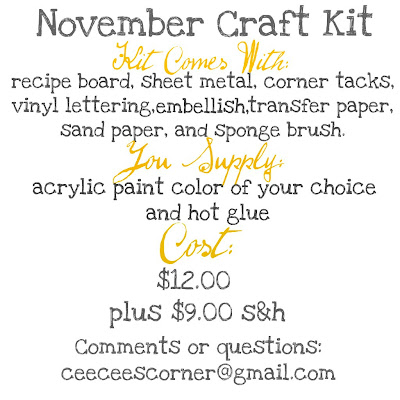
So me and a friend of mine over at Cee's Cee's Corner came up with a great idea to create craft kits!  You may know that I host a monthly craft night here in Portland.  But I have many friends and readers that just can't make it to craft night or live far, far away.  We wanted to create a way for you to be able to craft on your own.  So here we go, Claudia will introduce this months craft.  Take it away Claudia...

I love Papa Murphy's Pizza. Why? Because they actually make the pizza, and all I have to do is bake it and eat it. Simple and easy, right? Well, as I have ventured into the wonderful world of blogging and crafting,  I am discovering that people like to craft, but they just don't actually have the time or resources to go out and get all the "ingredients" for the craft...
So a friend and I have teamed up and would love to make a monthly craft kit for you! My friend, Christie, is the author of a great little blog named Portobello Road. She hosts a monthly craft group that I participate in, and the idea for our monthly craft kit kind of grew from our crafting group. Anywho, the kit comes with everything you need to put the craft together! However, there are some things we can't ship such as acrylic paints, hot glue, glue guns, etc., but everything else will be included. So basically we're like the Papa Murphy's of crafting! Ha!

We have decided to start things off slow and just offer one craft kit for November, but if things go well (and we hope that they do...), we will offer a couple of crafts for December.

For our November kit, we are offering a magnetic recipe board.
This recipe board is awesome!


I made one for my kitchen and we decided to offer it as one of our Super Saturday crafts.
And let me tell you, everyone who made this board just loves it!
What I love is that it allows me to keep my recipes off the counter and out of my way while I'm cooking. Here are the dirty details...


Shipping is a flat rate whether you order 1 board or 3 boards.
If you are an amazing human being and you order more than 3 boards, please contact us and we'll work out the shipping.


        Brown, Cream, or Black


Are you feeling crafty yet? Click below to purchase!
Email me at ceeceescorner@gmail.com with questions.
Also, if you have ideas, comments, suggestions, or just need a good rant,
I would love to hear from you!
This would be a really fun idea for a girls night out.
You order the kits, we do the prep, and you get to have fun!


Recipe Boards
Font, Color, & Embellishment


Sunday, October 23, 2011

Pink Champagne Baby Shower

Whew!  What a week...Super Saturday, lunch meetings, MPI (Meeting Professionals International) all day meeting, more meetings, deadlines, craft night and finally catering a baby shower. Needless to say I completely crashed this afternoon!  But I was so excited that the baby shower food turned out after hours of slaving cooking away in the kitchen, I must share with you.  Always good to post some recipes as well.

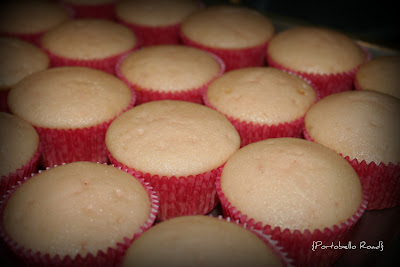
So when I was asked to come up with a menu for the shower, of course all I could think about was pink cupcakes.  It's a girl!  Then I saw this recipe for Pink Champagne Cupcakes and I had to make them.  Slight problem...I don't drink.  So both of my brothers had to be my taste testers.  One of my brothers is a chef so I had no qualms about that. 


Recipe


Pink Champagne Cupcakes

1 box of white cake mix
1 1/4 cups of champagne
1/3 cup vegetable oil
3 eggs
4 to 5 drops of red food coloring (I used the gel food coloring)

Champagne Frosting
1/2 cup butter, softened
4 cups powdered sugar
1/4 cup champagne
1 tsp. vanilla
4 to 5 drops of red food coloring
Pink sugar crystals or pearls

Step 1
Heat oven to 350°F (325°F for dark or nonstick pan). Place paper baking cup in each of 24 regular-size muffin cups.

Step 2
In large bowl, mix dry cake mix and champagne. Add oil, egg whites and food color. Beat with electric mixer on medium speed 2 minutes. Divide batter evenly among muffin cups.
Step 3 Bake 17 to 22 minutes or until toothpick inserted in center comes out clean. Cool 10 minutes; remove from pan to cooling rack. Cool completely, about 30 minutes.


Step 4
In medium bowl, beat frosting ingredients with electric mixer on medium speed until smooth. Frost cupcakes. Sprinkle with garnishes. Store loosely covered.

Makes 24 cupcakes


I also made some darling little fruit kabobs.  But these were not just any fruit kabobs, they were rainbow fruit kabobs with a delicious cream cheese pineapple coconut dip.  Pretty easy and great looking.

Recipe

Rainbow Fruit Kabobs
1-2 pints of strawberries
3 peaches or oranges or 1 canelope
1 whole fresh pineapple
green grapes
1/2 pint of blueberries
purple/red grapes
1 bag of skewers

Pineapple Coconut Dip
1/2 cup frozen pineapple juice concentrate
8oz. of cream cheese
1/2 cup of shredded coconut
1 tsp. of imitation coconut flavoring
1/2 cup of toasted coconut

Step 1
Prep all of your fruit.  Just chop in big chunks.
Step 2
Put fruit on the skewers in order of color (strawberry, peach, pineapple, green grape, 3 blueberries, purple grape...just like a rainbow!) and arrange on a platter.
Step 3
In a bowl, mix all of the ingredients for the dip.  Put in a serving bowl and sprinkle with toasted coconut.


My favorite part of the menu was this.....Brie En Croute or translated as Brie baked in puffed pastry.

Recipe

Maple Raspberry Baked Brie
1 large sheet if puff pastry dough
1 round of Brie cheese or Camembert (leave rind on)
Raspberry jam
Brown sugar
Maple syrup

Step 1
Preheat oven to 350 degrees.
Step 2
On a stick free cookie sheet or use parchment paper underneath, lay out puff pastry. 
Step 3
Cut off thin top of Brie.  Put the jam on top.  Turn over quickly and place down on top of the puff pastry.
Step 4
Wrap up the Brie.  Just bring up each corner and press together.  Turnover smooth side up and bake.  (if you want a cut out, take it from the first corner you would fold up, see pic)
Step 5
Drizzle maple syrup over top and sprinkle brown sugar.
Step 6
Bake at 350 for 25-30 minutes or until golden brown.  Let cool 10 minutes before slicing open and serving.  Serve with crackers, bread, or apple slices.

Serves 10 people


This is a crowd pleaser for sure and so easy!  I have some other party throwing tips for you.  I think a few things that could be difficult to decide is how much food to make and how many different items.  There are some different things to consider.  What time a day is the party?  Woman or men?  Are you providing a full meal or just some tasty bites?  For today's tips I will assume it is an afternoon party for 24 women and we are serving small bites.  I decided to serve mini chicken salad croissant sandwiches, baked Brie, (2) different types of cupcakes, and our rainbow fruit kabobs.  

Here are my suggestions for a party like this baby shower I catered...
1 savory meat item (chicken salad sandwiches)
1 savory vegetarian item (Brie)
1 healthy item (fruit) 
2 dessert options (cupcakes)
I normally would not have done two sets of cupcakes, but it was requested by the client.  I probably would have done one cupcake and one other item making sure that one is chocolate and one is not.

In deciding how much to make per person, a few notes.  You want to think about what items someone would have one or two...or three of and cost.  And then make the appropriate amount.  In the hotel business when we suggest amounts for how many appetizers for a light reception it would be 5 to 8 pieces per person.  So for this example, I made enough mini sandwiches for each person to have two, they were really small. One fruit kabob (only because fruit is expensive, but I am sure one person could easily have two).  I made two baked Brie, one serves about 10-12. For the cupcakes I assumed 1 1/2 cupcakes per person.  Figuring some will want one of each and some will just want one.

I hope this is helpful.  If you have any questions, please comment below. 


Tuesday, October 18, 2011

21 things you can do with a Pallet!

I have been oooohoooing and aaawwwing over all of these Pinterest pictures of pallets made into things.  I am just waiting for the time and space to work on some of these.  When I will actually get a house with a backyard...who knows.  But there are a few little projects that would fit just perfectly into some of my spaces. 

  1. Recycled Vertical Garden - Design Sponge
  2. Painted Pallet on Coasters - Tres Chere
  3. Pallet Day Bed - Under the Sycamore
  4. Outdoor Pallet Couch - Apartment Therapy
  5. Daybed - Casa Sugar
  6. Coat Hanger -El Costerero (in spanish, but the picture is self explanatory)
  7. Pallet Chair - Dornob
  8. Several Pallet Furniture ideas (No tutorials) - Home Deco2u
  9. Pallet Coffee Table w/glass top - Stylizimo
  10. Headboard - Crafty Nester
  11. Shoe Rack- Crafty Nester
  12. Misc Ideas - The Richmond Thrifter 
  13. Picture Display Pallet - Amanda Carver Designs
  14. Coffee Table with Drawers - Esprit Cabane
  15. Pallet Planter - Esprit Cabane
  16. Pallet Sign - WhipperBerry
  17. Pallet Painting - Young and Crafty
  18. Farm Bench - Craftberry Bush
  19. Table with Planter - Today's Nest
  20. Porch Swing - Sheryl Salisbury Photography
  21. Outdoor Pallet Table - Joy Ever After

#16
#15


#19
#13

Tuesday, October 11, 2011

Music Chair?

So I live in Portland, Oregon.  This is pretty much what our winters look like around here...

Friday
chancerainMostly cloudy with a 40 percent chance of showers. Highs 55 to 60.
Friday Night
nt_chancerainMostly cloudy with a 40 percent chance of showers. Lows 45 to 50...except 40 to 45 in outlying areas.
Saturday
chancerainMostly cloudy with a 30 percent chance of showers. Highs 55 to 60.

Since I do my painting and refinishing furniture in the garage/ally.  It is a little difficult to continue with the projects during winter.  I finished this chair a few months ago and thought I would share since the furniture posts will be a bit sparse for the next few nine months.

Some of you may know what this chair is suppose to be called, because I know there is a proper name for it. So comment and share!  I found it at good will and it screamed potential cuteness. 
It was quite a project, even though I thought it would be relatively simple.

I really don't get whoever made over this chair the first time. Teal canvas with chartreuse-ish green/yellow paint? 

Has good form though...

Here comes the regret...I used Citri-strip the tall green and orange can of paint stripper.  It is suppose to be less toxic.  It actually worked well.  But not for a chair with little itty bitty grooves.  I think if I could start over I would have just sanded a little primed and painted.  Even though having layers of paint is not a best practice.

I primed with 1-2-3 Zinsser water based primer and then I painted two coats of off white oops paint.


I lightly distressed it with my sander and upholstered the seat in a light aqua. It was a gift for my mother-in-law to go in a little corner by the river view window.  It is the perfect home for this __________ chair.

Sunday, October 9, 2011

Fall Fabric Pumpkins

The leaves are starting to change and the rain has hit the ground running. It is officially Fall in Portland. Remember that little giveaway last week!  Our fabric pumpkins...well I couldn't very well give some cute little pumpkins away without telling how to make them yourselves now could I? 

Here is what you will need:

Fall Fabric
Yarn
Steel yarn needles
Embroidery thread needles
Embroidery thread
Stuffing
Felt for stem
Needle nose plyers (optional)
Sewing machine (optional)

These pumpkins were adapted from some pumpkins I saw on Pinterest.  Mine are a little different (specifically the stem). There is a very long and detailed, picture by picture tutorial here if you need more instruction then what I have below. 

Start by cutting your fabric.  I tried to be creative and make tall ones and shorter wide ones.  But the tall ones are very hard to work with. I recommend square ones.  The size of fabric you'll need could be 12"x24" and 9"x18" and 7"x14". Just take what size you want and double the length.  Take the cut fabric and fold in half, so it makes a square.  Sew up the opposite side to the folded side.  I used a sewing machine but you could hand stitch it as well. 
It should look like this...

top
bottom

Then thread your embroidery needle with the embroidery thread. Start at the top and do a loose stitch. 
Pull thread and gather together. 
Then take your needle and thread it back and it forth a few times (this is where the plyers come in handy), tie off with a sewing knot. (make a  stitch, but leave a loop, and stick the needle back through the loop, pull needle all the way through and pull tight)
Turn right side out, and stuff with filling. 
Make sure its full, but not too full that you could not pinch together and sew it shut.  Now do the same thing that you did to the other side.  Pull together, then take your needle and thread it back and it forth a few times, tie off with a sewing knot. (make a stitch, but leave a loop, and stick the needle back through the loop, pull needle all the way through)
The pretty side will be your bottom. All the knots and yucky stuff will be covered by your stem later.  Cut about 3 feet of yarn. Thread your yarn needle.  Tie a big knot at the end of your yarn.  Start at the top/center and pull your needle all the way through to the bottom.  You might have to push the top and the bottom together to get the needle through.  Repeat a few times, then pull tight.  It should be starting to look more pumpkin like. 
 Then start to do your outer loops. Just keep going up and down through the center, but this time wrap your yarn on the outside.  Pull and do the next one.  Up and down, up and down.  I think I had about 8 lines on each pumpkin. 
Like this...

Next cut your felt.  In a triangle shape.

Then roll it up and glue or stitch onto the top of the pumpkin.
Great job!  Aren't they cute!

Happy Crafting,
Christie


Featured at:


UndertheTableandDreaming
monogram

Wednesday, October 5, 2011

Isn't she pretty!

So I have decided to be a real blogger I have to have a real camera.  I have scrimped and saved every penny from selling my refinished furniture and now it is time to re-invest.  I am starting modestly since I am new to the land of DSLR cameras.  I bought it used from the nicest guy...ever!  And it was not a bad thing that he kind of looked like Mathew Fox.  He spent about 30 minutes with me and my brother at Starbucks passing on his o' so informative knowledge about photography and this camera.  The Canon Rebel XT.  Isn't she pretty!  I have not named her yet...I am thinking Sophie.  It just came to me.  Let's hope her and I make some beautiful pictures together.

Monday, October 3, 2011

Sunday, October 2, 2011

"Boo Boo" Book Wreath

On Friday night I let my hubby go to the movies with my nephew for some family bonding time.  This left me at home, baby asleep, girly movie on the tube, and hands free.  Free to do some crafting!  This project took me about an hour and a half.  Not bad for a Friday night!  All you need is a foam wreath form or straw would do just fine.  I think I actually might have preferred a straw wreath.  An old book, and some straight pins.


Here comes the boo boo part.  You have to rip the book.  I know its hard...but just do it.  Rip it!  I used about 229 pages worth.  And I tried to use the pages that have a lot of words. 


So roughly scrunch, not fold.  Well you can, but I like a little less structured.  Then fold in half and put a pin in the middle.  Stick the pin into the wreath.  Then repeat quite a few times....


I put a few paper bats up there and some ribbon for hanging.  Pretty right! And so easy!

Happy Crafting,
Christie

Featured at:


UndertheTableandDreaming
monogram